Welcome to Promo on Demand. By the time you finish this guide, you'll have a fully configured game promotion ready to run on your casino floor — with the right users set up, your prizes and odds configured, and a clear picture of exactly what your players will see.
Engaged Nation has already created your organization and provided you with an admin login. Everything from this point forward is yours to manage. This walkthrough covers the five steps you'll take to get from that first login to your first live promotion.
Before you begin: Have your login credentials ready — your email address, temporary password, and your organization name. These were provided to you by Engaged Nation. If you can't locate them, contact our team and we'll resend them.
Step 1: Log In & Orient Yourself
Open a browser on any computer or tablet and navigate to the Promo on Demand login page. You'll be greeted with the P.O.D. sign-in screen.
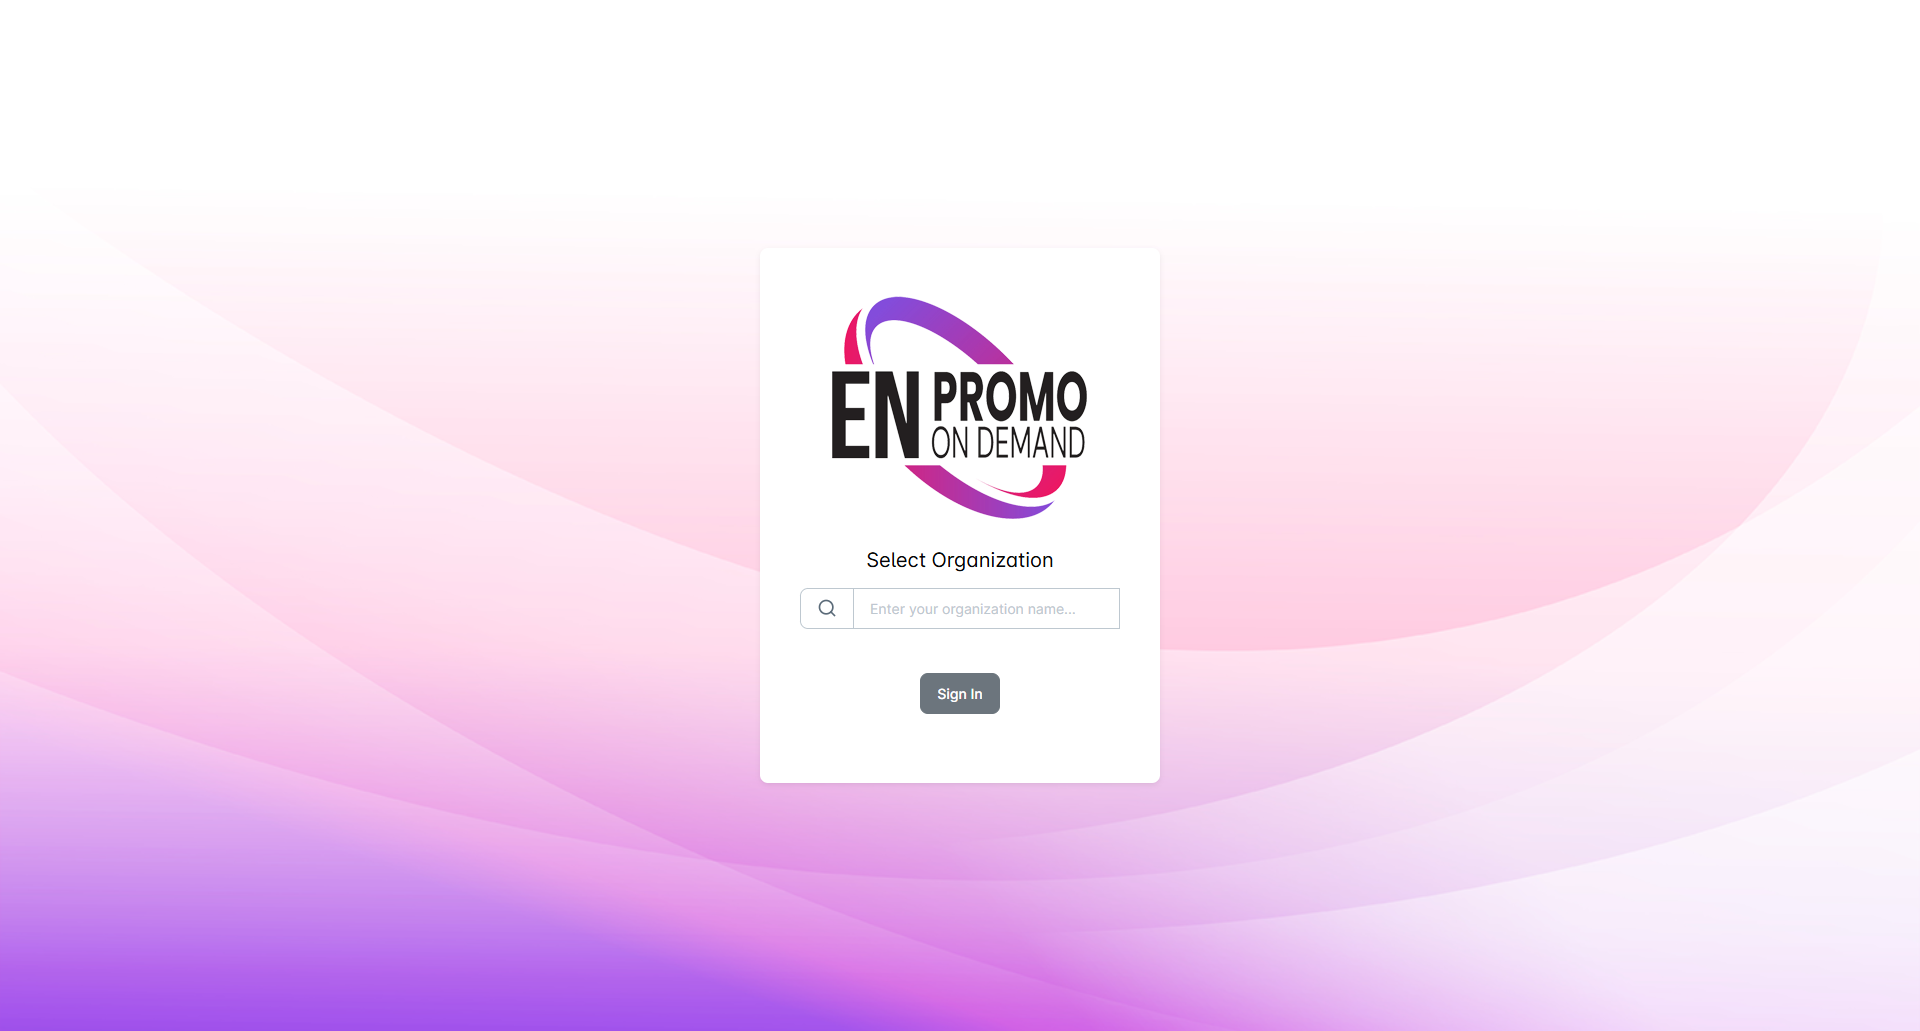
- In the Select Organization field, begin by typing the full and complete name of your casino or organization.
- Enter your email address and password, then click Sign In.
- You’ll be presented with a modal where you will enter a password of your choice. Once your password is set, you’ll land on the Admin Dashboard – your home base for managing everything in P.O.D.
Take a moment to familiarize yourself with the navigation on the left side of the screen:
- Dashboard — The Dashboard gives you quick-access cards to jump straight to your Games or Users — use it as your home base for navigating the portal.
- Drawings — The random player drawing tool for pulling winners from your predetermined event drawing pool. Using the P.O.D. drawing tool is optional. You can draw winners from your own CRM or even a manual drum of drawing entries.
- Users — Where you manage all admin and frontend user accounts for your organization.
- Games — Your game library. This is where you browse, select, and customize promotions.
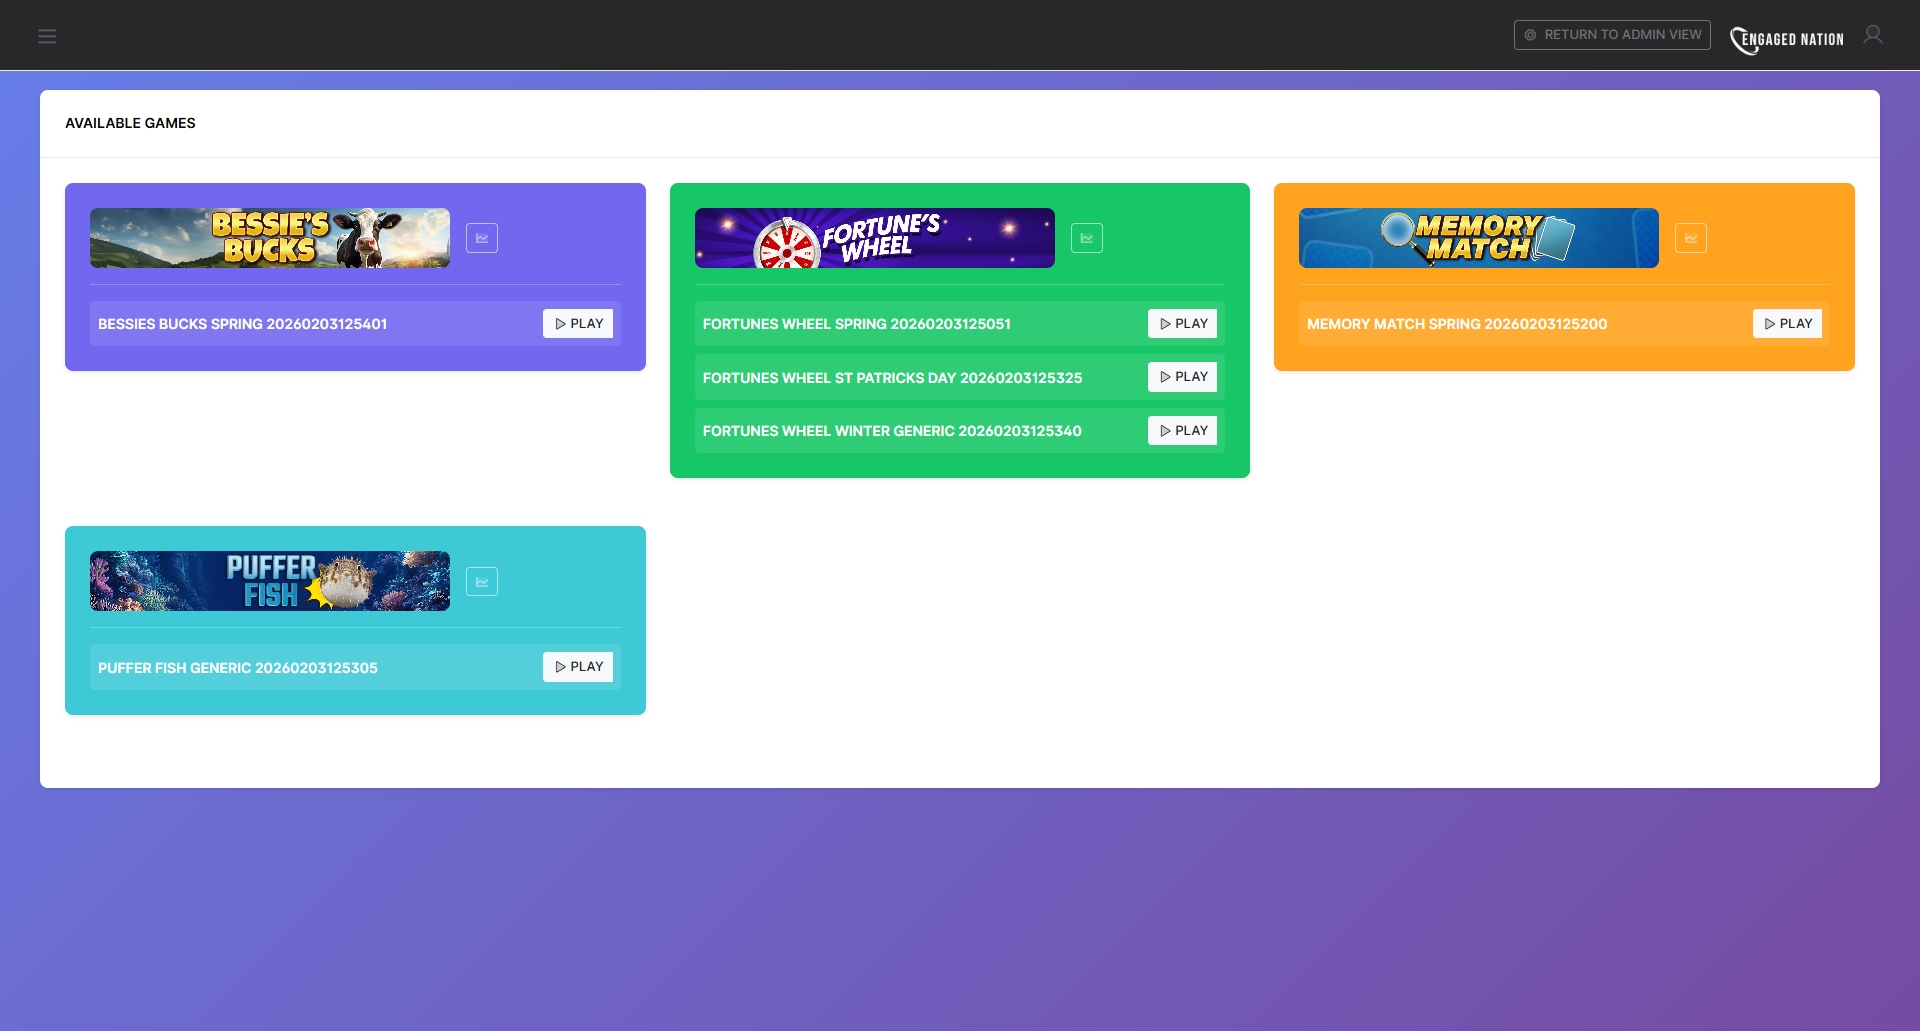
You'll also notice a Switch to Frontend View button in the top-right corner of the screen. This toggles you to the Frontend View, where you can see a clean list of all of your configured games that are ready to play at the present time. You can switch back to the Admin View at any time by clicking the RETURN TO ADMIN button.
Step 2: Set Up Your Users
Promo on Demand uses a three-tier user system. Understanding the difference between each role is important before you start adding users to your organization in P.O.D.
Admin Your role
Admin users have full access to the management side of P.O.D. — they can create and manage other users, customize games, configure prizes and odds, set promotion dates, and view reporting. Your organization was set up with one admin account (yours). You can create additional admin accounts for colleagues who need the same level of access.
Frontend User Floor staff
Frontend users only see the games that have been assigned to them to manage during the dates and times the games are scheduled to be played. When a frontend user logs in, they see a simple game lobby and Play buttons. This is the account type you’ll create for floor staff running promotions for players to participate in. Frontend users cannot access admin settings.
To create a new user, navigate to Users in the left navigation, then click the CREATE NEW USER button in the top right of the User screen. Fill in their name, email address and select their role - either Admin or Frontend.
A note on access: Frontend users only see games that have been explicitly assigned to them during the game configuration step. If a frontend user logs in and sees no games, it means no active configurations have been assigned to their account yet — you'll take care of that in Steps 3 and 4.
Step 3: Browse the Game Library & Select a Theme
Navigate to Games in the left navigation. You'll see a list of all games available to your organization.
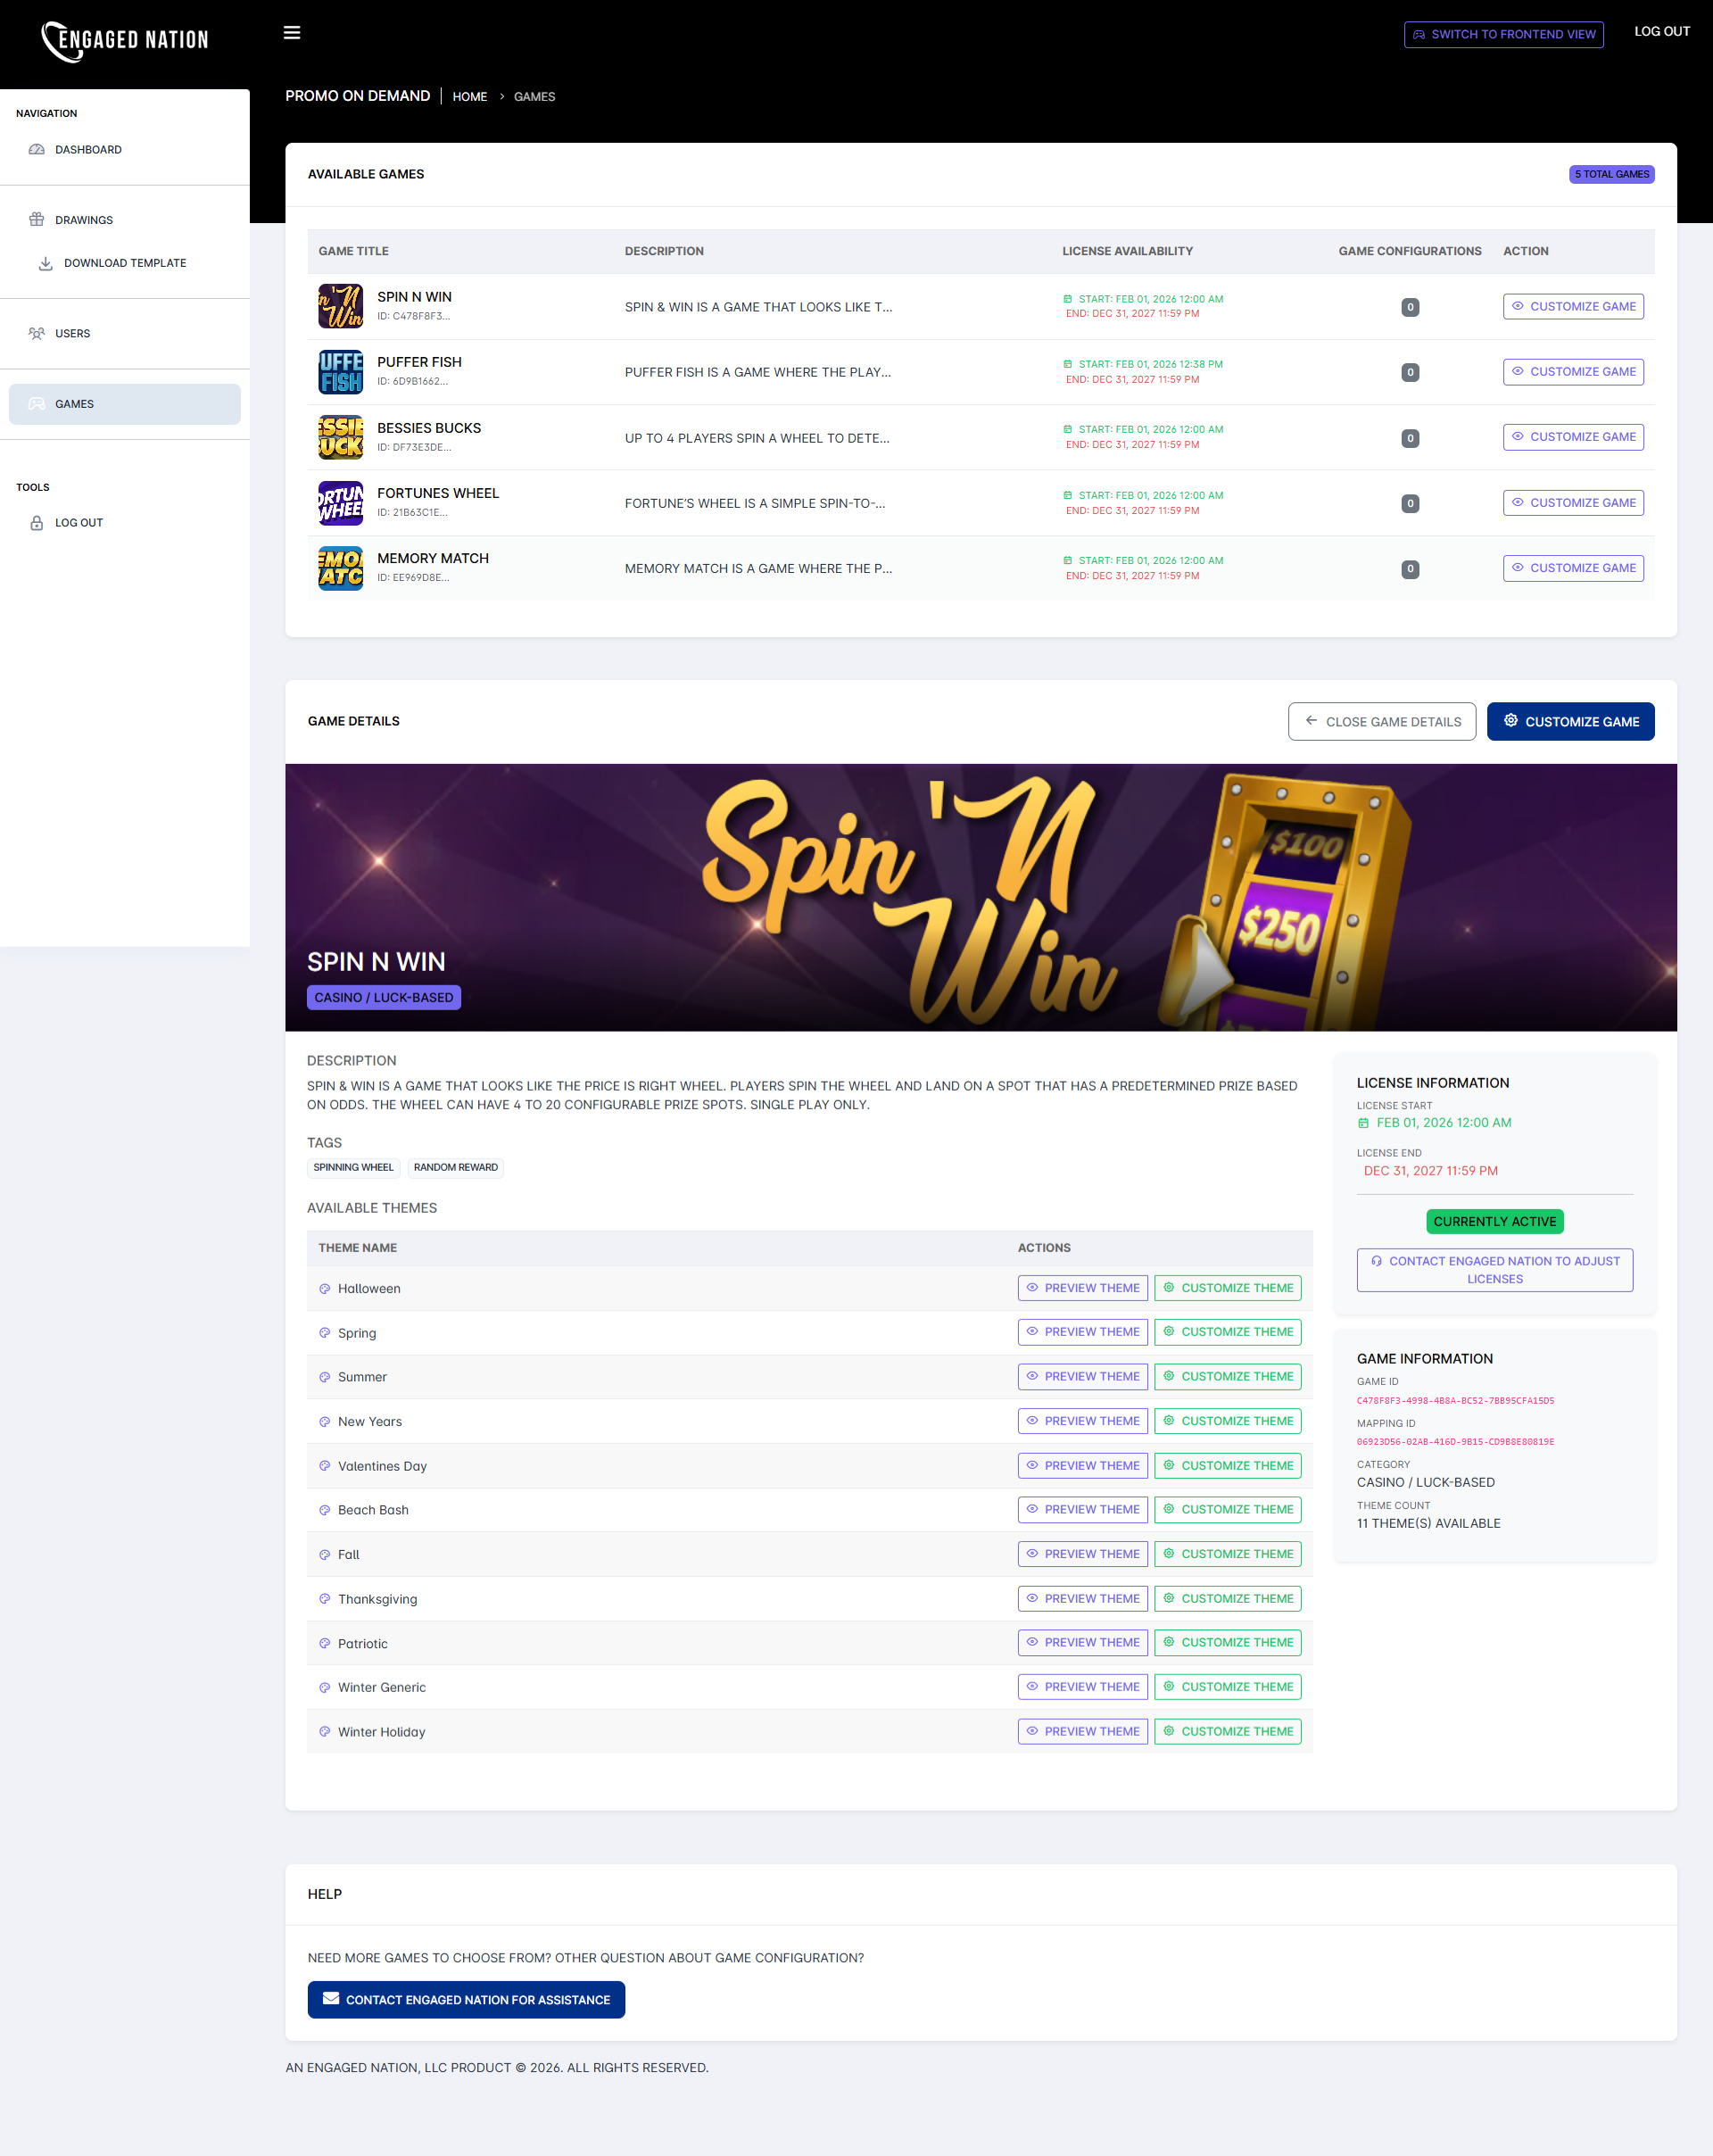
Click the CUSTOMIZE GAME button to the right of any game to expand its Game Details panel at the bottom of the screen.
Here you'll find:
- Description — A summary of how the game works and what players experience.
- Available Themes — Each game comes with multiple pre-built visual themes (seasonal, holiday, general, and more). Each theme changes the look, colors, and imagery of the game.
- License Information — The active dates your organization's license covers for this game.
To preview how a theme looks before committing, click Preview Theme next to any theme in the list. A preview window will open showing the game exactly as players would see it. Browse the themes until you find one that fits your upcoming promotion.
Once you've decided on a theme, click Customize Theme to begin configuring it. This opens the game customization page for that specific theme — which brings us to Step 4.
Step 4: Configure Your Prizes, Odds & Settings
The game customization page is where you define what players can win, how often, and which Frontend and Admin users have access to this version of the game. There are three main sections to complete.
Prize Configuration (In this example, we are using Spin 'N Win)
The Prize Spots Configuration table is the core of your game setup. Each row represents one possible prize outcome — what image appears, how likely it is to land, and what prize label players see when they win.
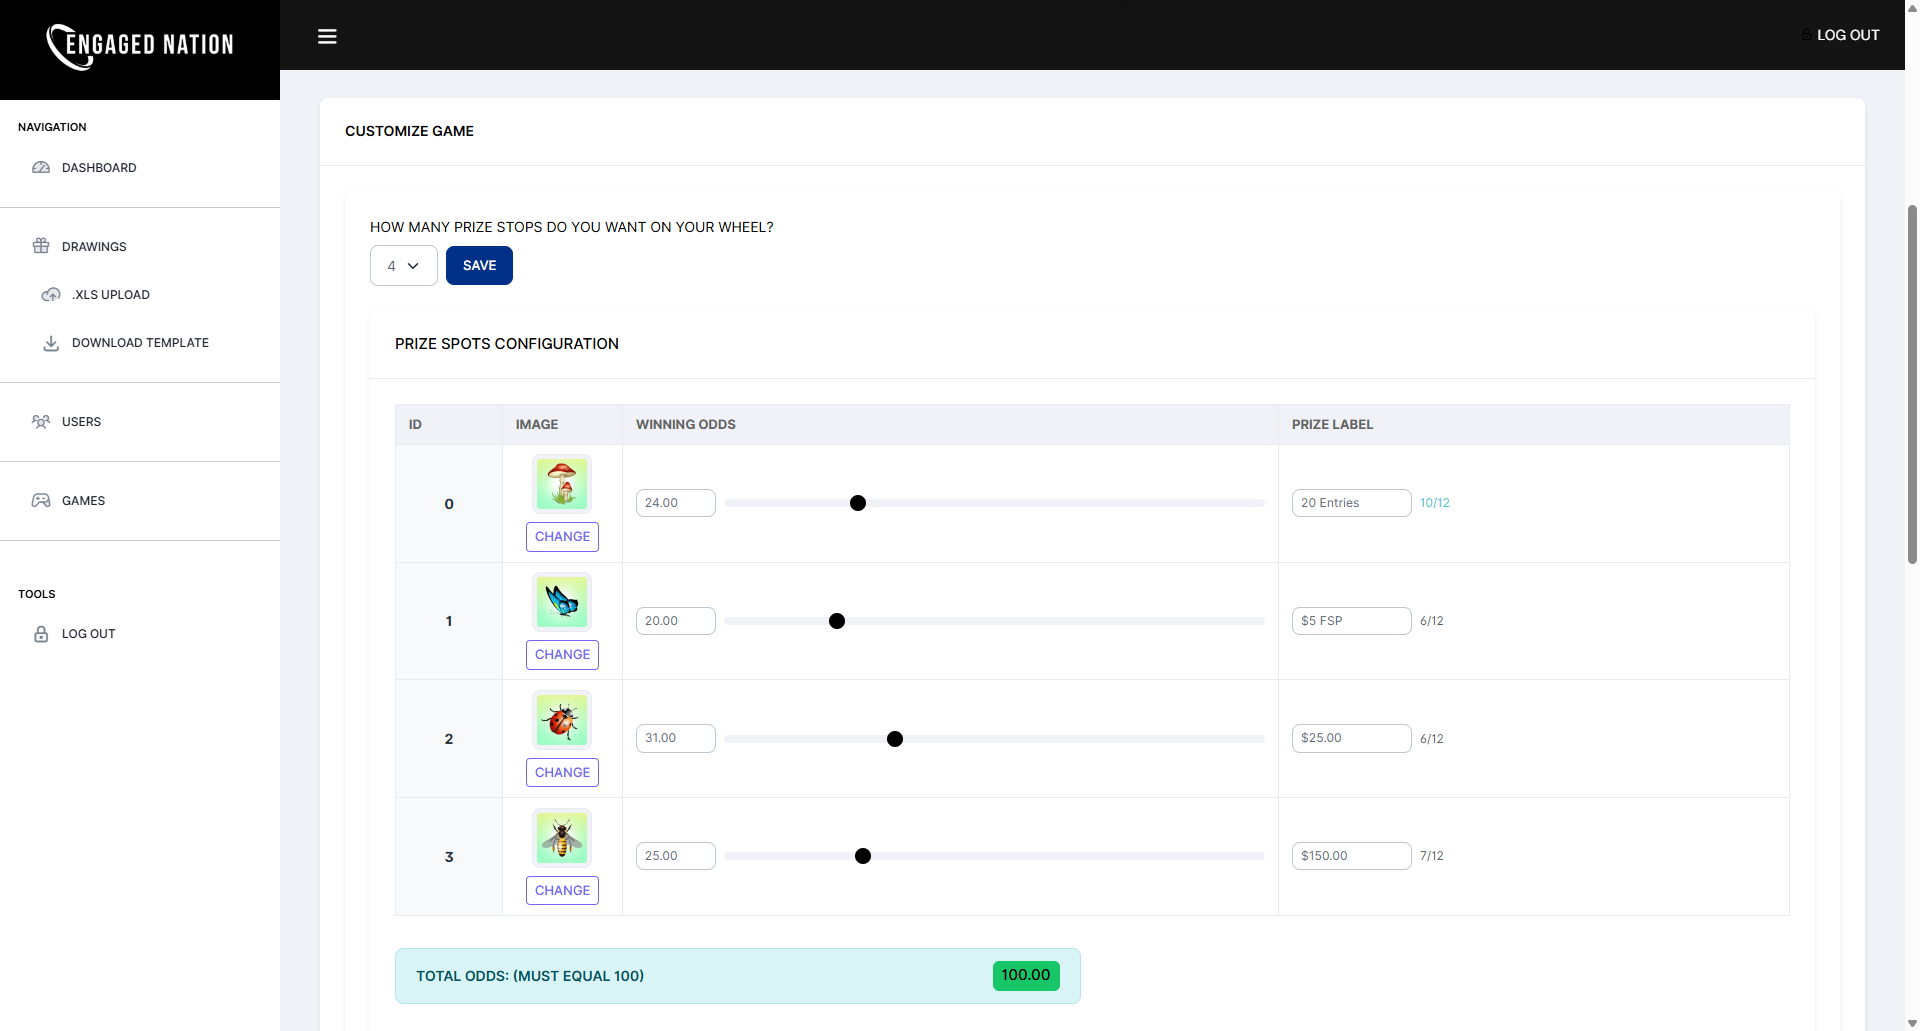
- Number of Prize Stops — Choose how many distinct prize outcomes the game will have (4 — 20 stops on the wheel).
- Winning Odds — Each prize stop has a percentage odds value. Use the slider or type directly into the field to set it. The Total Odds counter at the bottom must equal exactly 100.00 before the game can be saved. Distribute your odds intentionally – your highest available prize should generally have lower odds of being awarded than your mid or lowest available prizes.
- Prize Label — This is the text players see when they land on this stop. Keep it clear and specific: "$25 FP", "20 Entries", "$150 Cash".
- Image — Each stop displays a small icon. You can use the default images or click the Change button beneath an image to select a different image.
Odds must equal exactly 100. The system enforces this rule — you will not be able to save your configuration until the total reaches 100.00. If you're not sure how to distribute them, start with your highest-value prize at the lowest odds (1–5%) and work your way down, leaving your most common outcome (consolation prize or smallest award) to fill the remainder.
Name, Dates & User Assignment
Below the prize configuration, you'll find the remaining settings that control when and how this game is available.
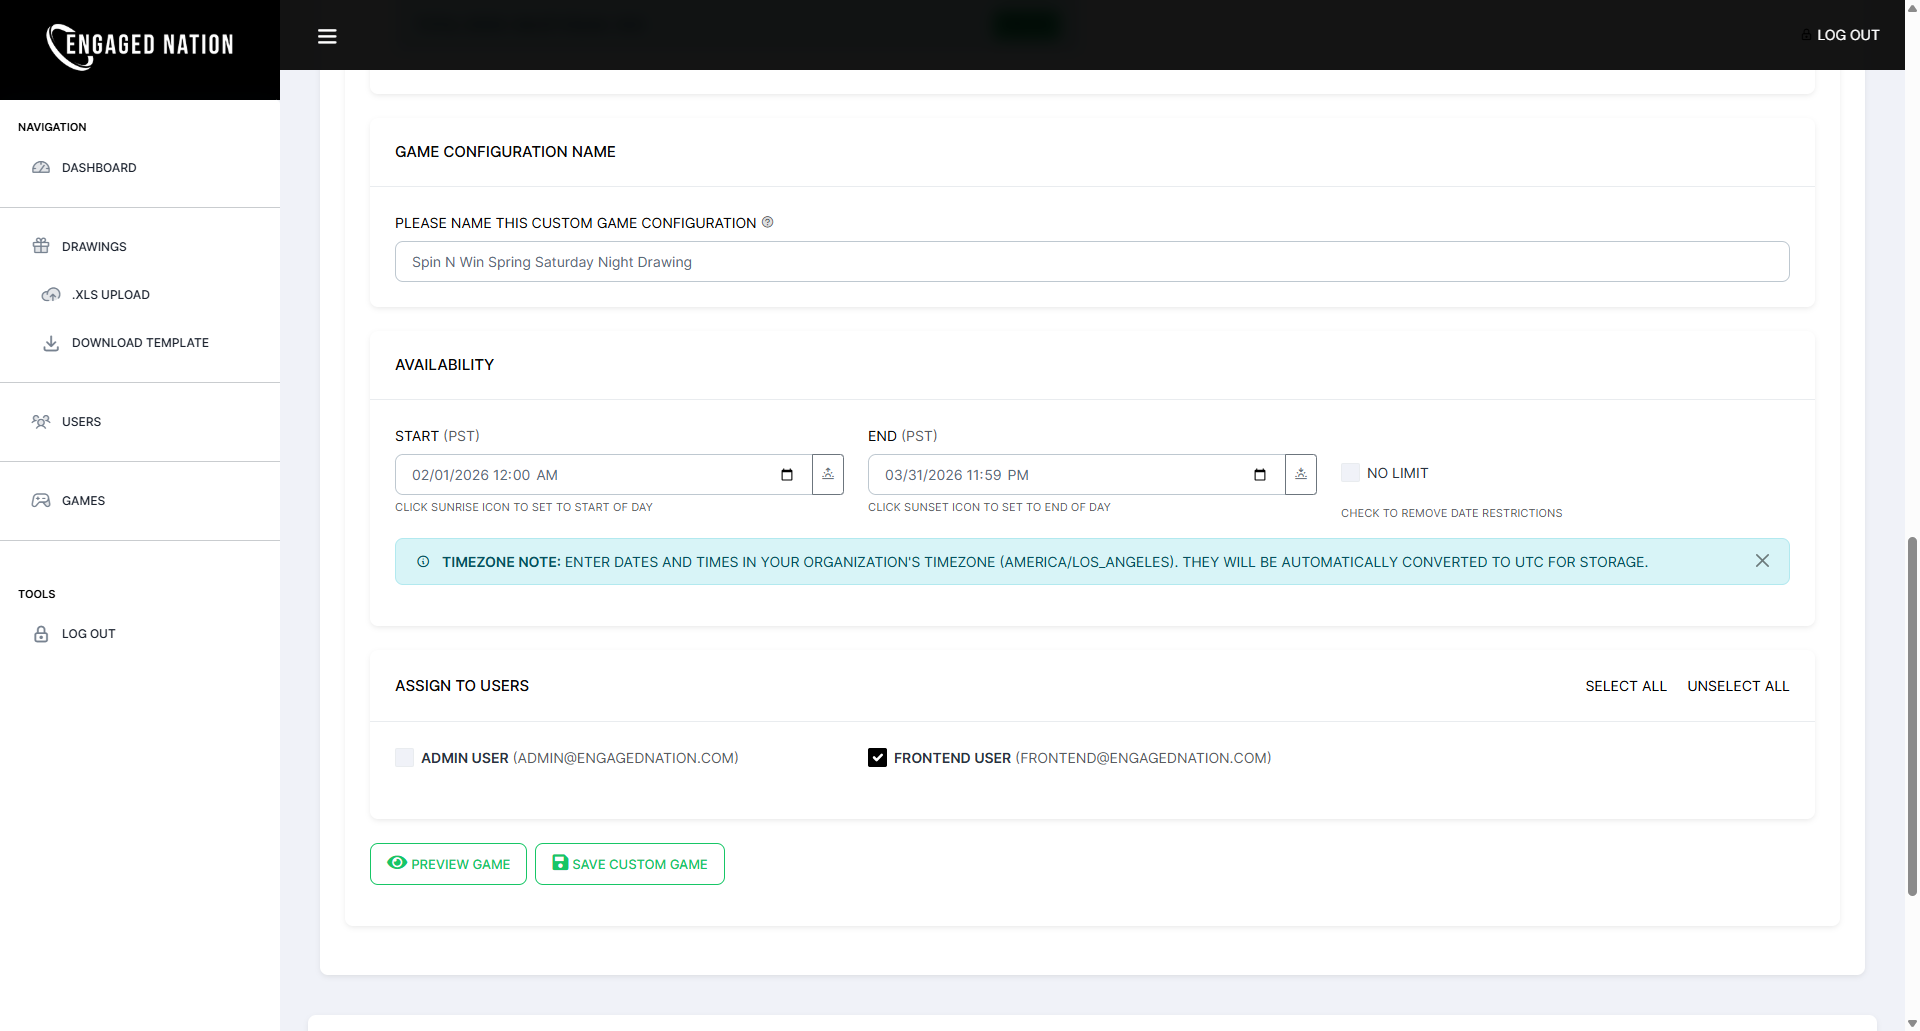
- Configuration Name — Give this saved configuration a descriptive name that will help you identify it later. A good format includes the game, theme, and promotion period — for example: "Spin N Win — Spring Drawing — Feb/Mar 2026". You can have multiple saved configurations per game, so naming them clearly is important.
- Availability Dates — Set the start and end dates for this promotion. Dates and times are entered in your organization's local timezone and converted automatically. Use the No Limit checkbox if you don't want an expiration date.
- Assign to Users — This is how you control what Frontend users can view and manage the gameplay for guests/promotion participants. Check the box next to each frontend user who should have access. Only users listed here will see this game in their lobby when they log in. If you haven't created any frontend users yet, go back to Step 2 — you'll need at least one assigned user before the game is accessible from the frontend.
When everything looks correct, click Preview Game to do a final check — this opens a live preview of the game exactly as an assigned frontend user would see it. If everything looks right, click Save Custom Game to publish the configuration.
Step 5: Launch & Run Your Promotion
Your game is now configured and saved. The last step is getting it in front of players on your floor.
Verify the Frontend View
Before going live, switch to the frontend view using the Switch to Frontend View button in the top-right corner of the admin screen. You'll see the game lobby exactly as your assigned frontend users will — your newly configured game should appear with a Play button.
Click the Play button on your game to launch it and verify the prizes, theme, and layout look exactly as intended. If the game availability dates, times or Frontend users need to be changed, you can Return to Admin View to adjust them. If any other game settings (odds, prizes) need to be adjusted, you will need to create a new game configuration.
Displaying the Game
Once you're satisfied with how the game looks, it's time to get it in front of players. Have a floor staff member (or an admin with frontend access) log into P.O.D. on a tablet or laptop, navigate to the game, and launch it.
You have two options for how to display it:
- Run it directly on the device — The game works perfectly right on the tablet or laptop screen. Have a Frontend or Admin User who will manage the promotion log into P.O.D. on a tablet or laptop, navigate to the game, and launch it.
- Cast it to a floor TV — For larger promotions or high-visibility displays, cast the game to any HDMI-equipped TV on your floor. This makes the game visible to a wider audience and creates a more engaging floor presence. The three most common methods are:
- Wireless casting — Use AirPlay, Miracast, or Chrome Tab Cast depending on your hardware. Full instructions: How to Display P.O.D. on Your Digital TVs.
- j5create ScreenCast — Our top hardware recommendation. A small plug-in kit that creates a direct wireless link from your tablet or laptop to any TV — no Wi-Fi network required. Full guide: Wireless Casting Made Easy: The j5create ScreenCast.
- HDMI cable — The most reliable option for permanent installations. A USB-C to HDMI cable connects any modern tablet or laptop directly to the TV.
Running the Promotion
With the game displaying on the floor TV, your floor staff logs in as a frontend user on their device and taps Play to launch the game for each player. The game runs in the browser — no downloads, no app installs. Each session is automatically logged to your dashboard the moment it completes.
Reviewing Your Results
After the promotion, log back in as an admin and navigate to the Dashboard. You'll find a summary of all sessions played, prizes awarded, and player activity during the event. For compliance and audit purposes, a full session-by-session record is also available — every spin, drawing result, and prize outcome is logged with a timestamp and can be exported at any time.
You're all set. Once you've completed your first promotion, the process becomes second nature. Most properties find they can go from login to a fully configured, live game in under 15 minutes. As you grow more comfortable with the platform, explore multiple saved configurations per game, the random drawing tool under Drawings, and the player upload workflow for larger promotional events.
Questions about anything covered in this guide? Contact our team — we're here to help you get the most out of Promo on Demand.