A campaign is a promotion players join on their own phones. You share a link or a QR code; players open it, register, and play whenever the campaign is open, with prizes and limits you choose.
This guide builds one from start to finish: what to have ready, choosing a type, the wizard's four steps, and sharing the finished campaign. For what campaigns can do and why, see Campaigns: Empower Your Customers to Play on Their Own Devices. For looking after it once players arrive, see Run a Live Campaign.
Campaigns are turned on per organization. If Campaigns isn't in your menu, Engaged Nation turns it on for you: use Contact Engaged Nation For Assistance.
Before You Start
Have these ready, and the wizard goes quickly:
- A game configuration for most types. Make one in Games first, for a game with the megaphone icon (Campaign Enabled) on the Dashboard. See Getting Started for how. Use a separate configuration from the ones your staff run with guests: a configuration added to a campaign leaves Assisted Play.
- The basics: a name, the start and end, and whether anyone can join or only people you invite.
- Footer details: your address, phone and responsible-gaming message, for the bottom of the page. The footer is required.
- Your rules as a PDF, if you have them.
- A prize list, if you'll give each player a prize you chose.
Choose a Type
Click Campaigns in the menu, then Create a Campaign. The first thing to choose is the type, under Select Your Campaign Type:
- Single Game Campaign: one game for the whole campaign.
- Multiple Game in Succession Campaign: several games one after another, such as a new game each week.
- Multiple Simultaneous Games Campaign: games side by side, including games you schedule day by day.
- Pro Football Pick 'Em Campaign and Prop Card Challenge Campaign, if Engaged Nation has turned them on for you.
- Survey on Demand Campaign: a survey instead of a game, with an optional reward.
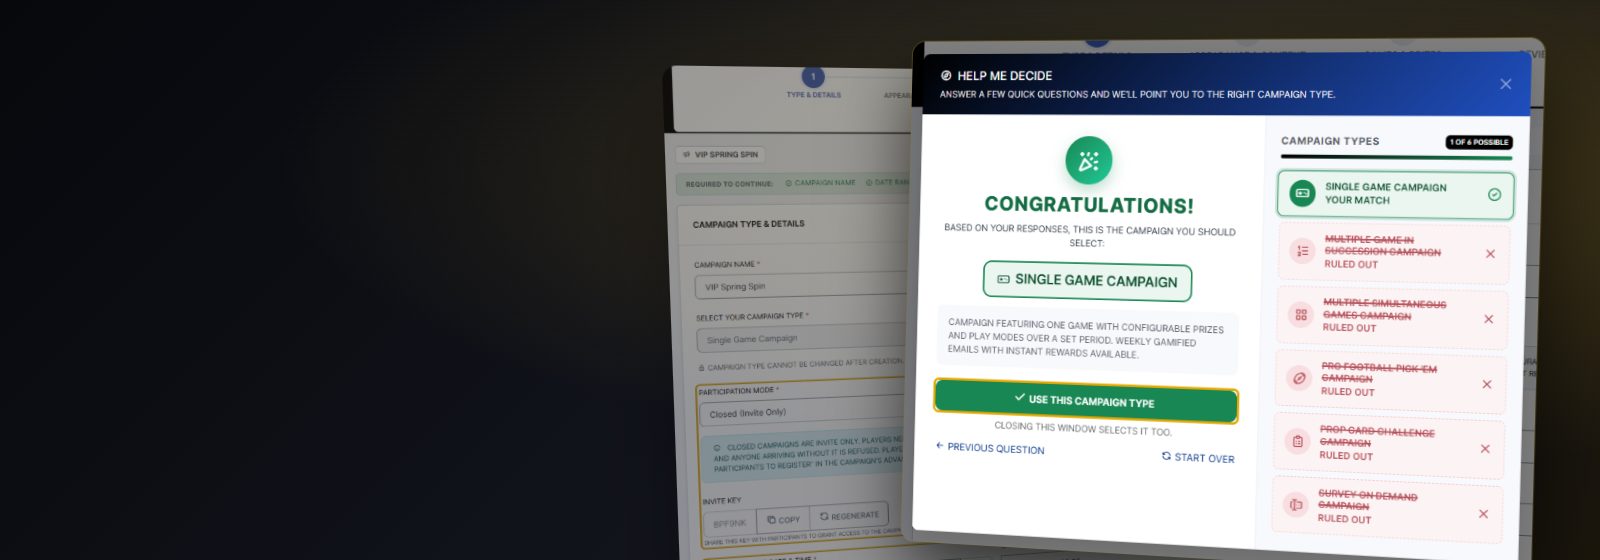
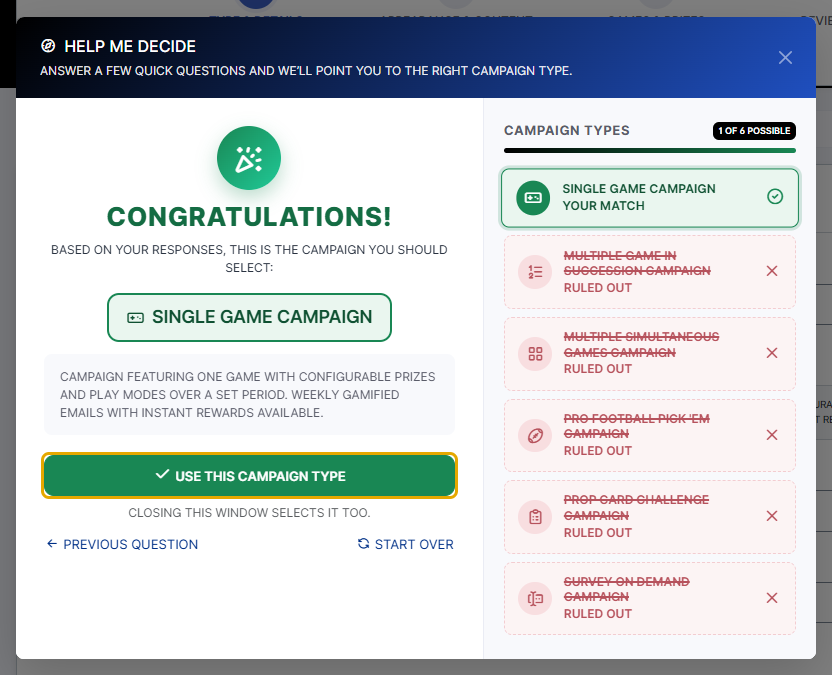
Not sure? Click Help Me Decide. Up to four yes-or-no questions rule types out until one is left; click Use This Campaign Type. Choose carefully: Campaign type cannot be changed after creation.
This guide follows a Single Game campaign. Survey, football and prop card campaigns have their own third step; their guides explain it: Survey on Demand, Pro Football Pick 'Em, Prop Card Challenge and Simultaneous Games.
Step 1: Type & Details
- Type the Campaign Name, and choose the type.
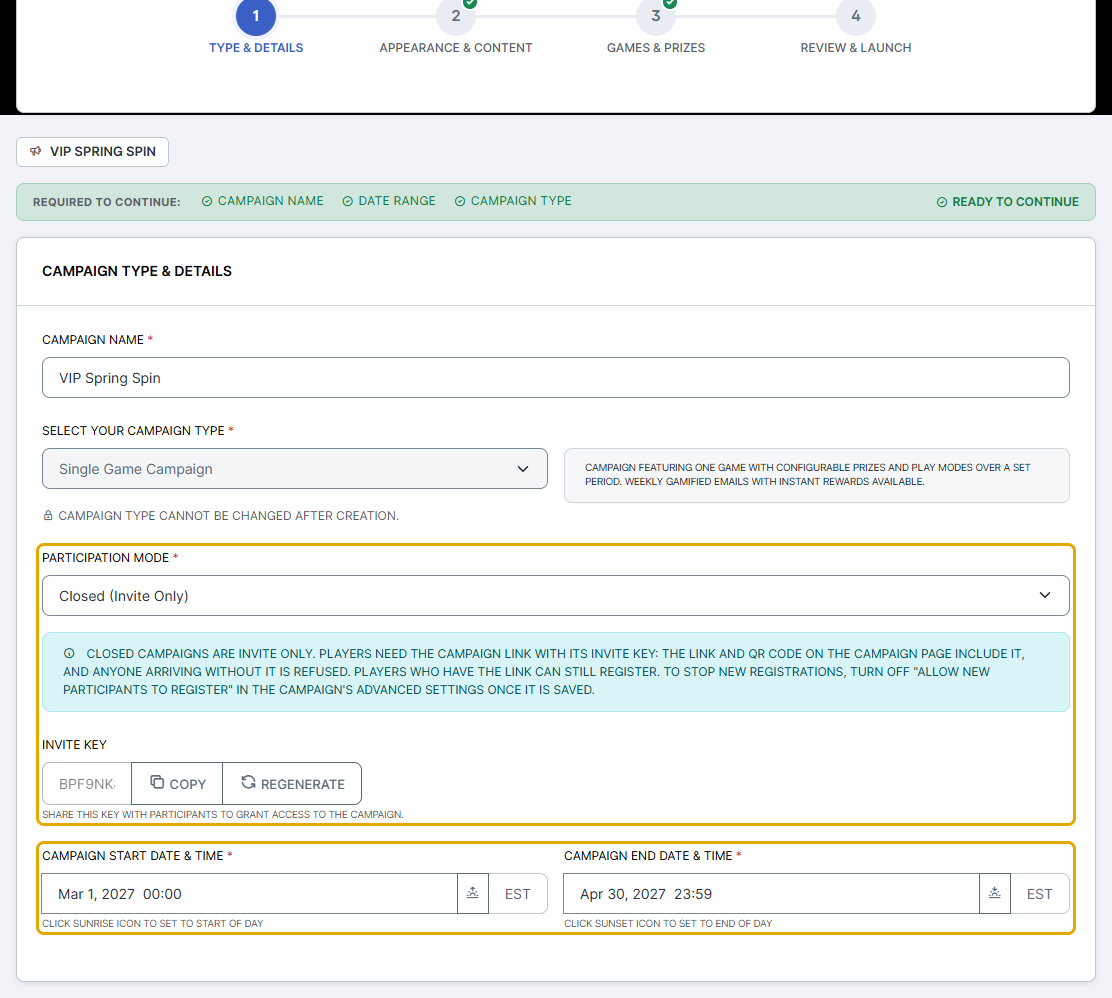
- Choose the Participation Mode: Open lets anyone with the link register and play; Closed (Invite Only) adds an Invite Key to the link, and anyone arriving without it sees "Access Denied".
- Set Campaign Start Date & Time and Campaign End Date & Time. They're in your organization's timezone, shown beside each box. The sunrise and sunset buttons set the very start and end of a day.
- Under Email Integration, turn on Enable iPost Email Integration? if you'd like your participants to receive emails. An Engaged Nation representative then contacts you to set it up.
- Click Next.
Saving as you go: the first Next saves your campaign as a draft. After that it saves whenever you move between steps, not on a timer. If you try to leave with unsaved changes, you're asked to Stay Here, Save & Navigate or Discard & Navigate. A draft isn't live until you save the last step.
Step 2: Appearance & Content
This step is the campaign's page: how it looks and what it says. Each section opens and closes; Expand all opens them all.
The look
- Organization Logo: your organization's logo is used unless you upload another for this campaign.
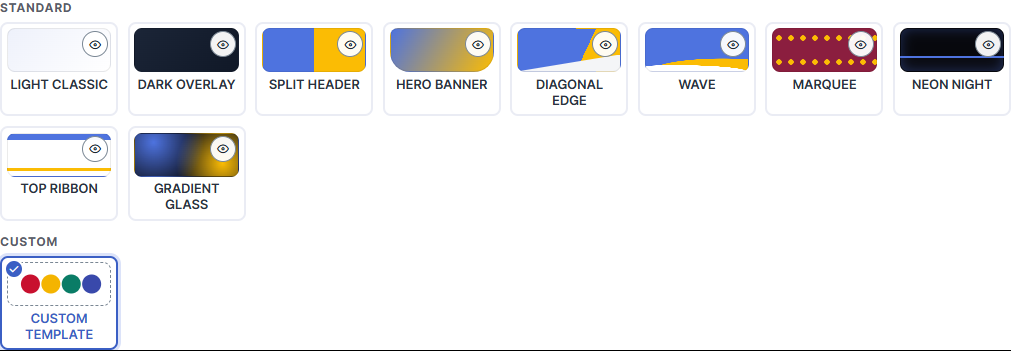
- Theme & Colors: pick a Campaign Theme, from Light Classic to Gradient Glass, then a Primary Color and Secondary Color if you want your own. The theme styles the page around the game; the game keeps the theme you chose for it in Games.
- To match your own website instead, choose the Custom Template, the last card. See Build Your Own Campaign Template.
The page's words
Under Page Content:
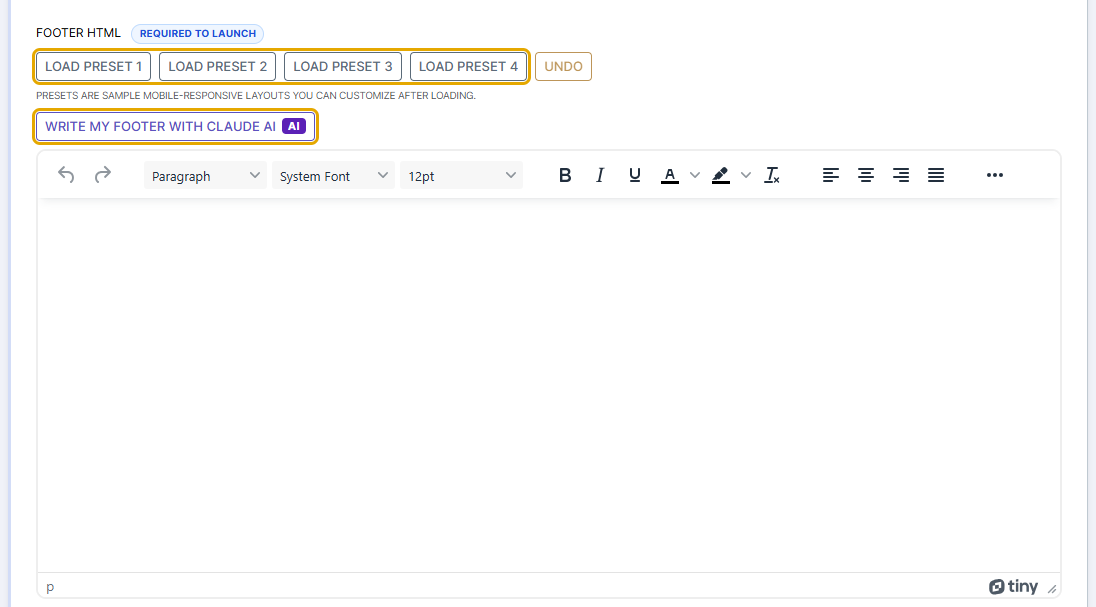
- Footer HTML is Required to launch. Load a layout with Load Preset 1 to Load Preset 4 and change its words, or click Write my footer with Claude AI (uses Claude AI): it writes one from your organization's details and your website's footer, copying only facts it's given, so check every line.
- Coming Soon Page HTML and Thank You Page HTML, optional: what players see before the campaign starts and after it ends. Each has presets and a preview.
- Info Box HTML, optional: an extra box for prizes, winners or offers, with an optional picture carousel. Choose which views show it.
Rules and registration
- Upload Campaign Rules: click Upload Rules PDF. A "Rules & FAQs" link then appears at the bottom of the campaign page.
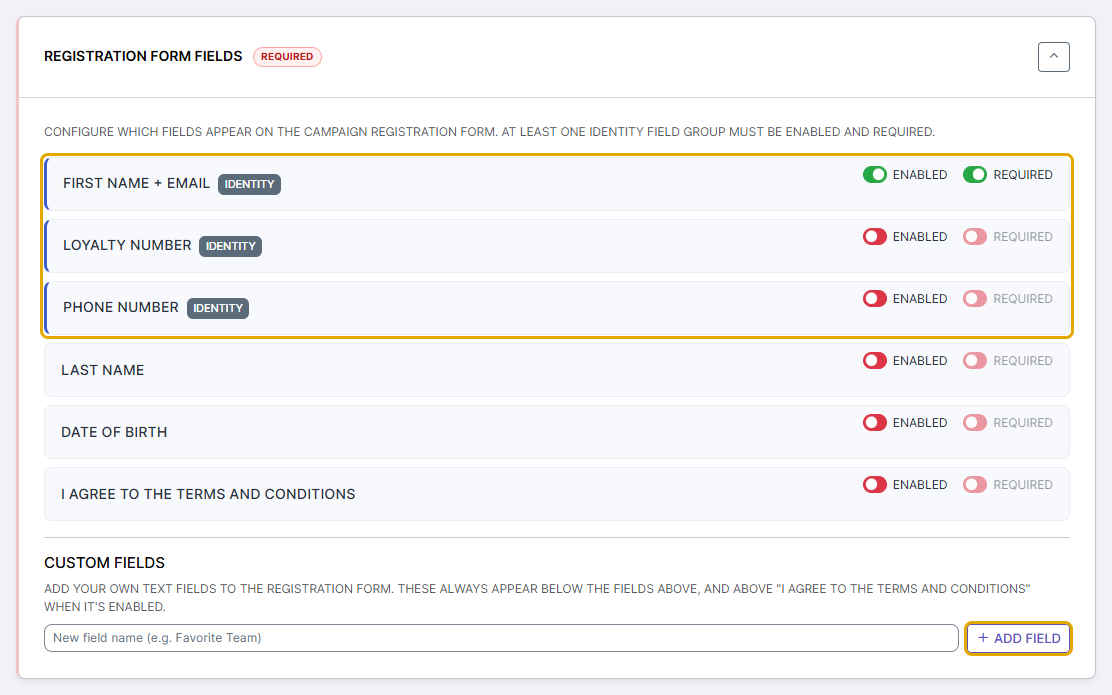
- Registration Form Fields: what players give when they register. For each field, Enabled asks for it and Required makes it a must. At least one identity field, First Name + Email, Loyalty Number or Phone Number, must be enabled and required: it's how a returning player is found. Add your own questions under Custom Fields with Add Field.
Step 3: Games & Prizes
- Choose a configuration under Available Game Configurations and click Add Game. A card for it opens below.
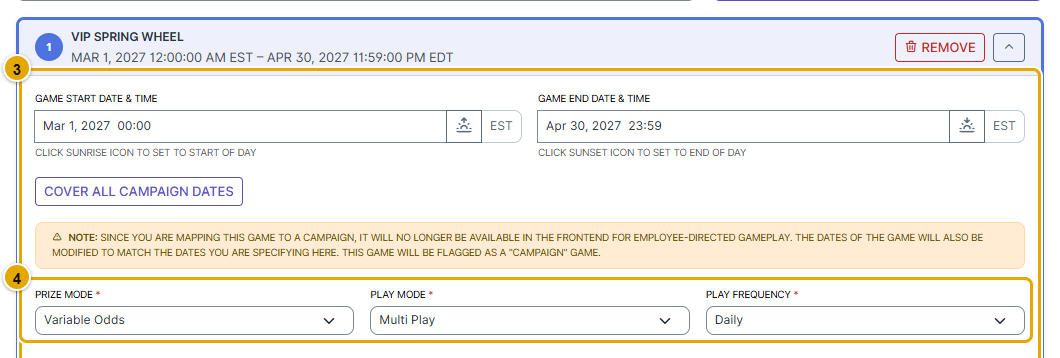
- Set its Game Start Date & Time and Game End Date & Time, or click Cover all campaign dates.
- Choose its Prize Mode, Play Mode and, for Multi Play, Play Frequency.
Variable Odds or One-to-One
- Variable Odds: every play is a draw, by the odds in the game's configuration. Step 3 lists the prizes, and you can give each a Prize Description, such as how to collect it.
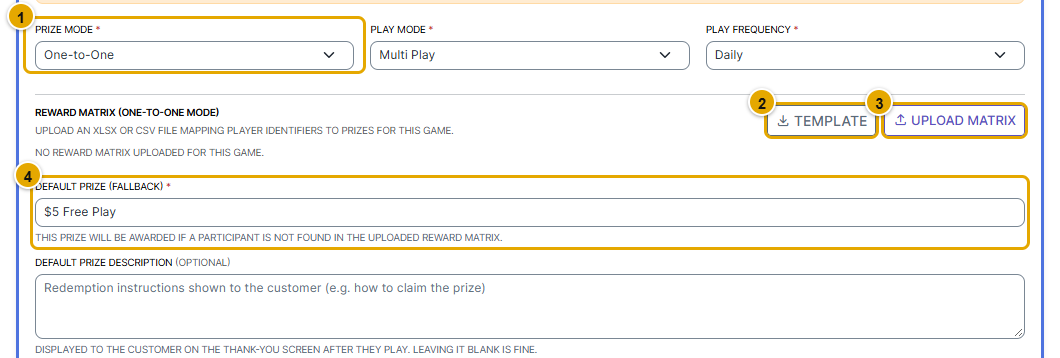
- One-to-One: you decide each player's prize. Click Template, fill in a row per player with their prize and the details to find them by (loyalty_number, phone, or fname and email), and Upload Matrix. Then type a Default Prize (Fallback) for players who aren't in your list.
A player is matched to the first unused row by their loyalty number, then their phone, then their first name and email, using only the details your registration form asks for. Each row gives its prize once. Keep long loyalty numbers formatted as Text in Excel.
How often players can play
Single Play is once for the whole campaign. Multi Play is as often as its Play Frequency: Daily, Weekly or Monthly, counted in your organization's timezone. The limit is checked when each play is saved, so playing in two windows at once doesn't get round it.
Covering every day
Every day of the campaign needs a game. A Single Game campaign's game covers them all; a Multiple Game in Succession campaign's games follow one another with no gaps or overlaps. Coverage Gaps Detected means some days have none; the Schedule Overview calendar shows which.
Once the campaign is saved, Drawing Entry Resets in this step can take players' drawing entries away on a schedule, for example after each weekly drawing.
Step 4: Review & Launch
The last step sums the campaign up and checks it. Save works once every item of the Launch Checklist has a green tick: a name and valid dates, an available type, a theme, an identity field, at least one game with every day covered and no overlaps, and a footer. An item in red names what's missing.
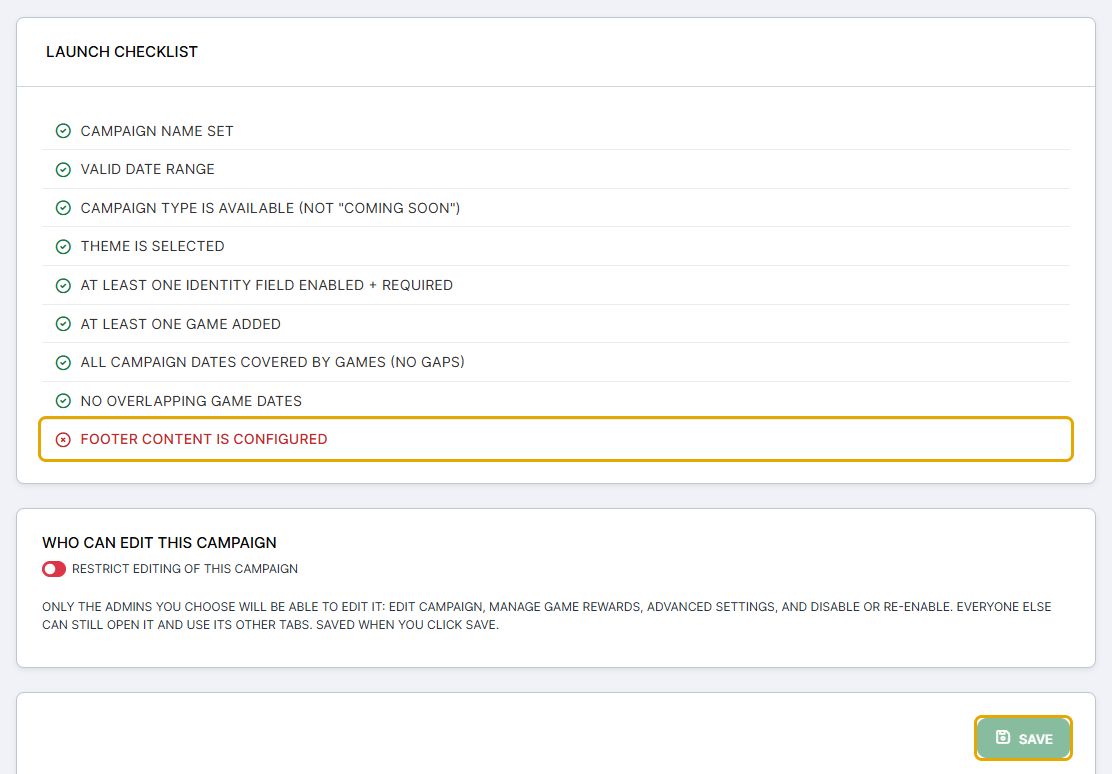
Under Who can edit this campaign, Restrict editing of this campaign lets only the admins you choose change it later. Click Save: the campaign goes live and its page opens.
Share It
On the campaign's page, the Campaign Info tab has everything you need to send players to it:
- Campaign URL, with a button to copy it;
- QR Code, and Download QR to save it for print or a screen.
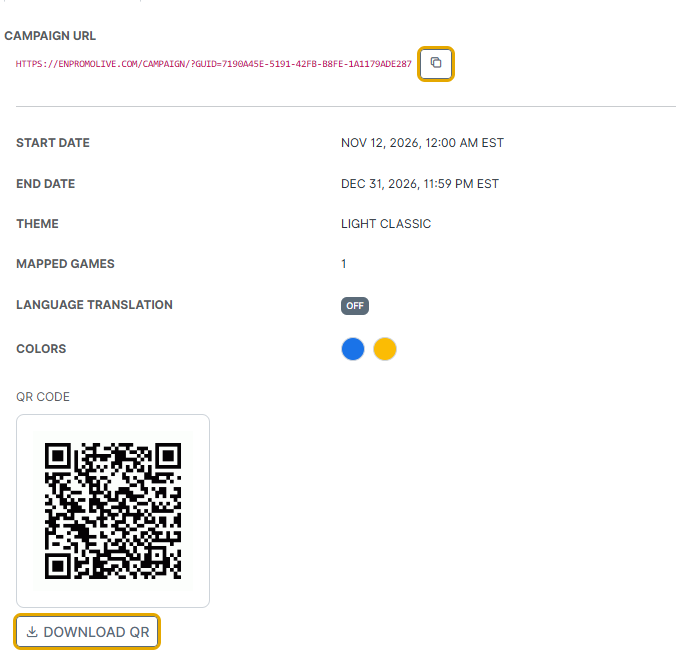
A Closed campaign's link and QR code carry its invite key, so share them exactly as given. The Email Info tab shows how to build links that fill in each player's details, for an email to your members, and can email a single invitation. For where to put the QR code, see guides such as Restaurant & Casino Table Tents and Digital Signage & Outdoor Advertising.
If the Wizard Won't Go On
Each step lists what it needs under Required to continue, ticking each item off; when all are done it says Ready to continue. The step bar shows how many issues each step still has. If Step 3 has no configuration to add, it says why and offers Go to Games.
In Summary
- Have a game configuration, your footer details and, for One-to-One, your prize list ready first.
- Choose the type in Step 1, with Help Me Decide if you're unsure; it can't change later.
- Step 1 sets the name, Open or Closed, and the dates; Step 2 the look, the footer, the rules and the registration form; Step 3 the games, prizes and play limits.
- Step 4's Launch Checklist must be all green before Save makes the campaign live.
- Share the Campaign URL and QR Code from the campaign's Campaign Info tab.